Export Graduate Views Based on Survey Responses
Overview
Creating custom views allows you to filter and view graduates based on specific survey responses. Once your custom view is created, you can export the data in that view into an Excel spreadsheet.
Steps to Create and Export a Custom Graduate View
1. Load All Graduates:
- Click on Graduates in the left column.
- Click the Load All Graduates button.
2. Select the Ceremony:
- If there are multiple ceremonies, select the relevant ceremony from the All Ceremonies dropdown.
3. Create a New View:
- Click the drop-down menu with the eye icon labeled All Graduates to see all existing views.
- At the bottom, click Create View.
4. Configure the New View:
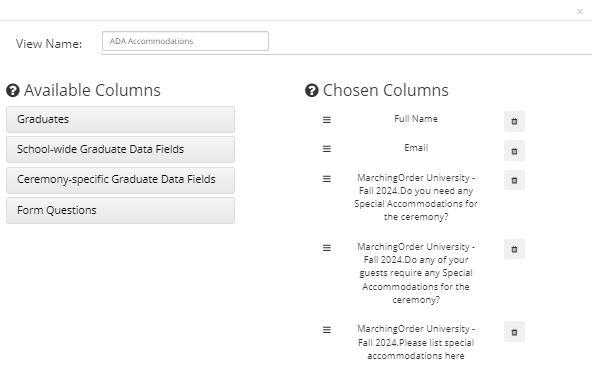
- Name your View:
- In the pop-up window, enter a name for the view that is easy to identify (e.g., ADA Accommodations).
- Select Columns to display:
- Under Available Columns, choose the columns you want to include (e.g., Full Name, Email Address).
- Click on each option to move it under Chosen Columns.
- Include Additional Data:
- To include other data, explore the School-Wide Graduate Data Fields and Ceremony-Specific Data Fields.
- Click on Form Questions to include relevant registration form questions (e.g., special accommodations).
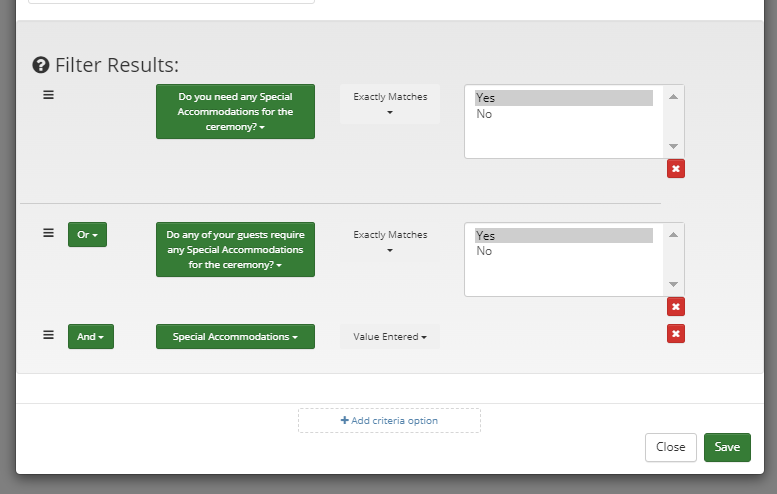
5. Filter Graduates:
- Click Add Criteria Option under Filter Results.
- For each filter:
- Click the green button to select the desired question from the form (e.g., “Do you need any special accommodations?”).
- Set the condition to Exactly Match the answer (e.g., Yes).
- Add more criteria as needed by clicking the green button again and selecting additional questions.
- Adjust the logical operator between criteria from “And” to “Or” if needed to include graduates meeting any of the criteria. For example, if you want to include graduates who answered "Yes" to needing special accommodations themselves or "Yes" to needing special accommodations for their guests, set the operator to “Or” to ensure both types of responses are included.
6. Save the View:
- Click Save to create the view.
7. Export the data:
- Click on the All Graduates dropdown and select your newly created view.
- Click Export Graduates View to generate an Excel spreadsheet with the selected data.
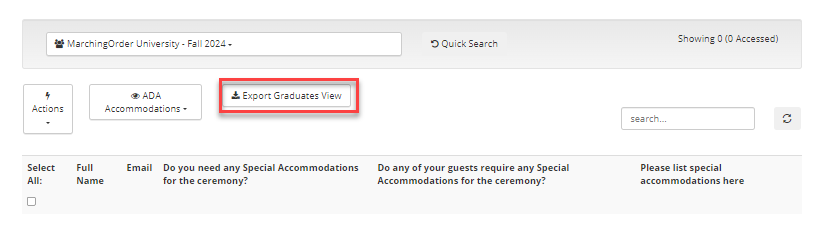
Note: The exported data is useful for emailing specific graduates or ceremony preparation.
By following these steps, you can effectively manage and export graduate data tailored to your needs.