Staff Check-In With TimeClock
Pre-Ceremony Instructions
- Determine Required Fields: Identify the fields needed for your post-ceremony report. The required fields for employees are:
- FirstName
- LastName
- FullName
- Consider including other fields such as Manager, Department, etc., to assist with processing employee hours.
- Add Optional Data Fields: Add the additional optional data fields to your MarchingOrder Assistant site as EMPLOYEE data fields.
- Compile Employee Information: Your client success manager will provide a data template to compile employee information. Return this on the same date as your graduate data is due for adding employees to your TimeClock site.
- Use GradPasses for Employees
- Create a separate ceremony in the MarchingOrder Assistant for staff.
- Here, staff can register, RSVP, sign up for shifts, etc.
- Upload the employee data template to the MarchingOrder Assistant site.
- Make sure their GradPasses are assigned after upload.
- Your client success manager will use this data to add employees to the TimeClock site.
Using TimeClock
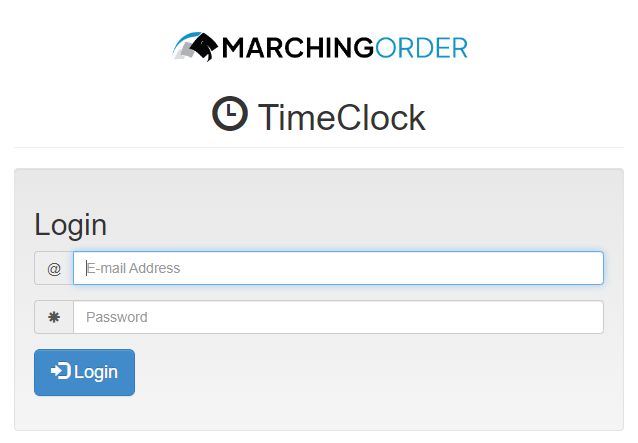
1. Log-In
- Go to MarchingOrder TimeClock or copy into the browser http://timeclock.marchingorder.com.
- Enter log-in credentials.
2. Scan/Add Employees
After logging in, MO TimeClock defaults to the scan page. To return to this page, click Scan in the top menu.
- Clock In/Out with Badge Scan
- When a badge or GradPass is scanned, the staff member will be clocked in or out, and their information will populate on the screen.
- If the scan is incorrect, click the red Undo Scan button. If correct, continue scanning immediately.

- Employee Not Found
- If a scanned barcode is not in the database, a pop-up alert will appear. Click Add Employee.
- Enter employee information and click Submit.
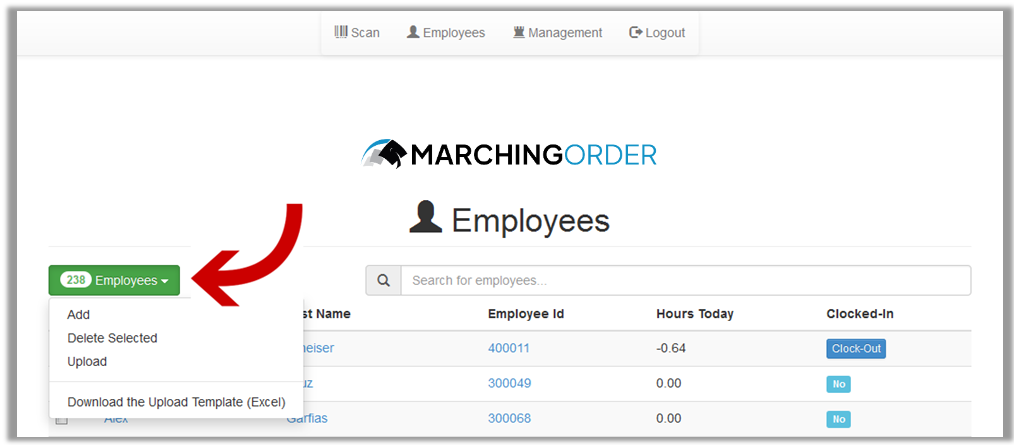
- Add Employees Manually
- Click on the Employees tab in the top menu, then click the green Employees dropdown and select Add.
3. End of Day Procedures
Ensure all employees are clocked out. Navigate to the Employees tab and review the “Clocked-In'' column to see who is still clocked in. Click the blue Clock-Out button to clock them out.
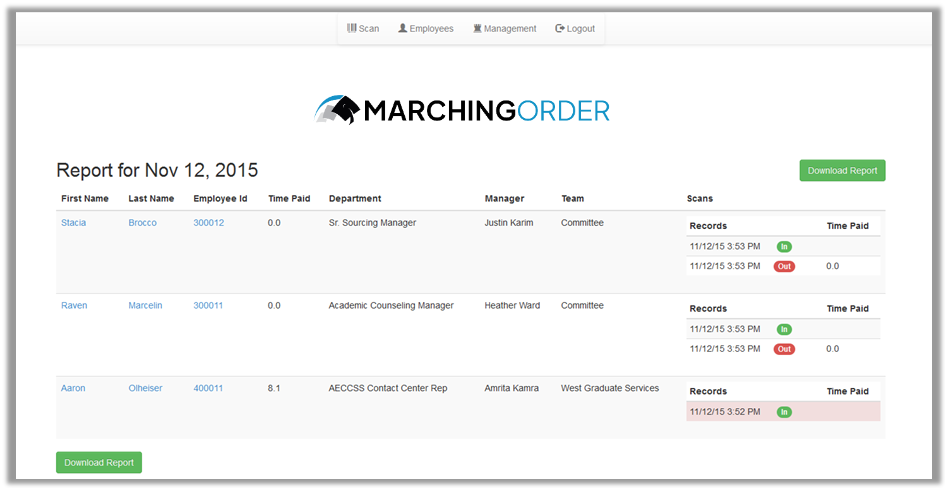
4. View/Download Event Report
- Click Management in the top menu, then select View Report.
- Staff members not clocked out will be highlighted in pink.
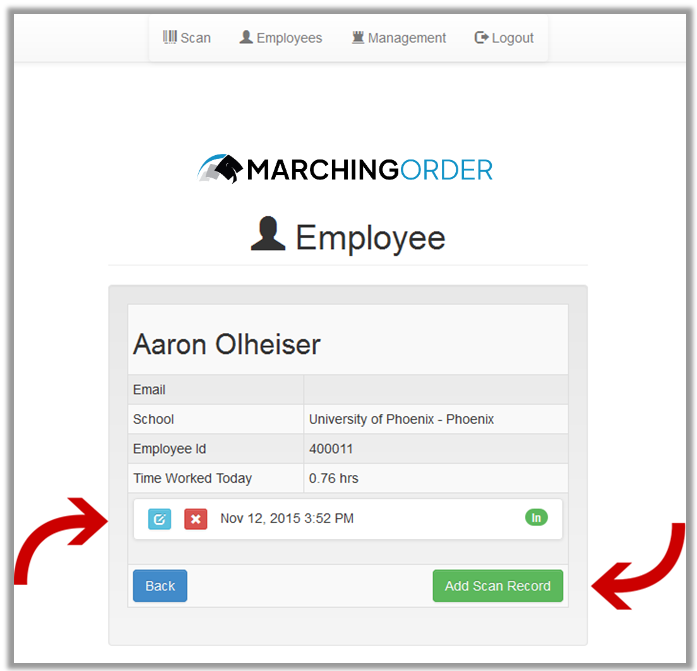
- Manually Adjust Records
- To add a scan record, click the green Add Scan Record button.
- To edit a record, click the blue edit icon next to the scan you wish to change.
- Download Report
- Once all staff records are validated, click the Download Report button to download an Excel file to your computer.